Melt Chocolate Like a Pro: Microwave vs. Double Boiler Guide
The allure of silky, molten chocolate is undeniable. From generously drizzled strawberries and decadent chocolate-dipped pretzels to the rich, glossy finish on an elegant chocolate torte, perfectly melted chocolate is a cornerstone of countless indulgent desserts. It adds a depth, richness, and luxurious texture that transforms ordinary ingredients into extraordinary treats. However, achieving that dreamlike consistency – smooth, lustrous, and free from any graininess or burnt bits – can sometimes feel like a culinary challenge. Many home bakers have faced the disappointment of seized, lumpy, or scorched chocolate, turning a simple task into a frustrating ordeal.
Fear not, aspiring chocolatiers! Learning
how to melt chocolate like a seasoned pro is a fundamental skill that, once mastered, will elevate your dessert game exponentially. While the process may seem intimidating, understanding the two primary methods – the gentle, controlled warmth of a double boiler versus the quick convenience of a microwave – is key. Each technique offers distinct advantages and, when executed correctly, will yield beautifully melted chocolate ready for your culinary creations. This guide will walk you through both methods, providing expert tips and insights to ensure your chocolate melts perfectly every time.
The Art of Melting Chocolate: Why Precision Matters
Why is melting chocolate such a delicate dance? It primarily comes down to cocoa butter, the fat component in chocolate. Cocoa butter has a specific melting point and a crystalline structure that is very sensitive to heat. Applying too much direct, intense heat too quickly can shock these crystals, causing the cocoa solids and fats to separate, leading to a burnt taste, a grainy texture, or even a hardened, crumbly mess known as "seizing."
The goal is always a smooth, fluid, and glossy consistency. This not only looks appealing but also ensures proper adherence for dipping, seamless integration into batters, and a delightful mouthfeel in any finished dish. Understanding the principles behind indirect heat and controlled bursts will be your secret weapons in mastering this essential baking skill. Whether you're making a simple fondue or working on a complex pastry, the quality of your melted chocolate will directly impact the success of your dessert.
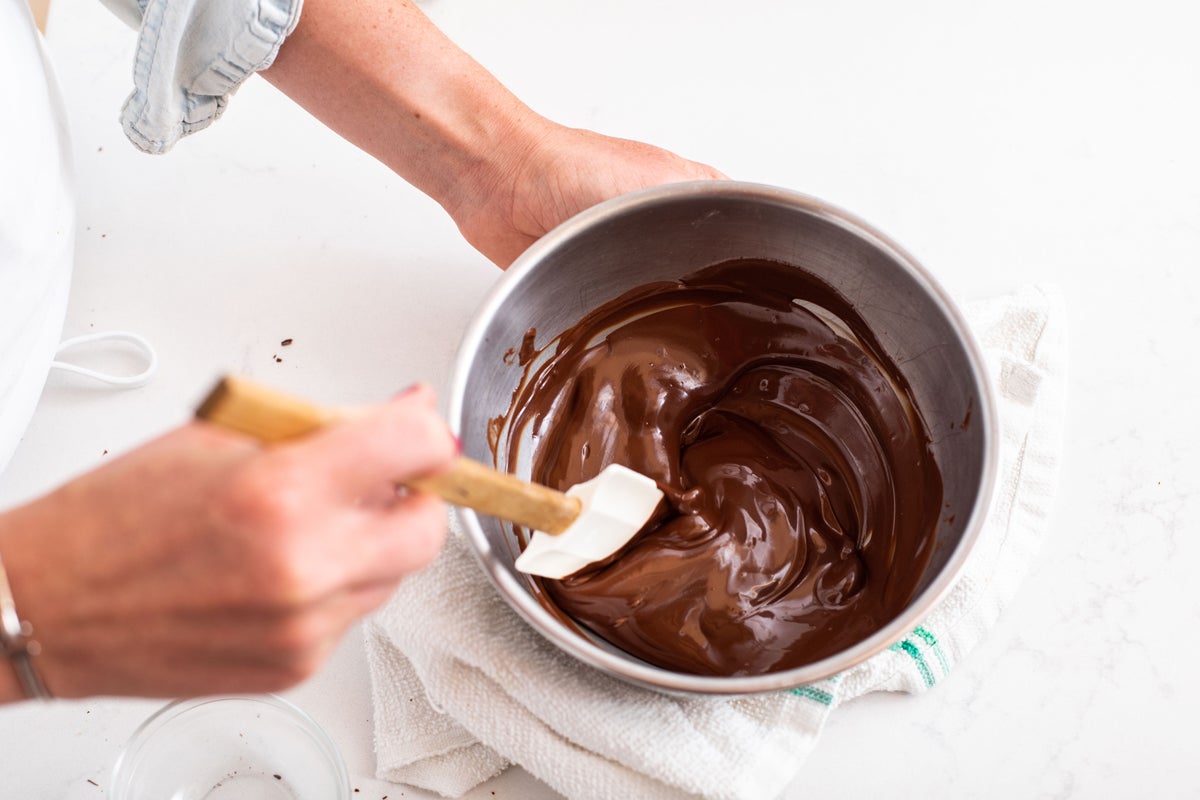
Mastering the Double Boiler: Gentle Heat for Flawless Melts
When control and a truly silky texture are paramount, the double boiler method – also known as a bain-marie – is your best friend. This classic technique uses indirect heat to gradually warm the chocolate, making it almost impossible to burn and ensuring an even, consistent melt.
What is a Double Boiler?
A double boiler isn't necessarily a specialized piece of equipment. It typically consists of two cooking vessels: a saucepan and a slightly smaller, heat-safe bowl that comfortably nests on top of the saucepan without touching the water below. The saucepan holds a small amount of simmering water, and the steam generated from this water provides a gentle, enveloping heat source for the chocolate in the bowl above.
Why Choose the Double Boiler Method?
*
Superior Control: The indirect steam heat prevents the chocolate from ever coming into contact with a direct flame, drastically reducing the risk of burning.
*
Even Melting: The consistent steam ensures uniform heat distribution, leading to a perfectly smooth, lump-free melt.
*
Ideal for Delicate Chocolates: This method is perfect for high-quality, high-cocoa content chocolates, as well as when you plan to temper chocolate, where precise temperature control is crucial.
*
Silky Texture: The gradual melting process helps maintain the cocoa butter's structure, resulting in an exceptionally smooth and glossy finish.
*
Suitable for Larger Batches: It's often easier to manage larger quantities of chocolate with this method compared to the microwave.
Step-by-Step Guide to Melting Chocolate on the Stove:
1.
Prepare Your Setup: Choose a medium saucepan and a heat-safe bowl (glass or stainless steel are excellent choices) that fits snugly over the top of the saucepan without falling in. Crucially, the bottom of the bowl should *not* touch the water when placed on top.
2.
Add Water: Fill the saucepan with about 1-2 inches of water. Place it on the stovetop and bring the water to a gentle simmer, not a rolling boil. A rolling boil can create too much aggressive steam and jostle the bowl.
3.
Chop Your Chocolate: While the water heats, finely chop your chocolate into uniform pieces. Smaller, evenly sized pieces will melt more quickly and consistently.
4.
Melt the Chocolate: Place the bowl with the chopped chocolate on top of the simmering saucepan. The steam rising from the water below will gently heat the bowl. Stir the chocolate frequently with a heat-proof spatula or spoon. Stirring helps distribute the heat evenly and encourages the chocolate to melt smoothly.
5.
Achieve Perfection: Continue stirring until the chocolate is fully melted and completely smooth, which usually takes about 2 to 3 minutes, depending on the amount and fineness of your chop.
6.
Remove and Dry: Once melted, carefully remove the bowl from the saucepan. Immediately wipe the bottom of the bowl with a clean towel to remove any condensation or water droplets. This is a critical step to prevent any moisture from accidentally dripping into your melted chocolate.
Crucial Caution: Water is the Enemy!
Even a tiny droplet of water can cause chocolate to "seize." Seized chocolate instantly transforms from a smooth, luscious liquid into a thick, grainy, unusable mess. This happens because water causes the cocoa solids to clump together. Always ensure your bowl is dry, your utensils are dry, and wipe any condensation from the bottom of the bowl. For more detailed strategies on
avoiding burnt chocolate and achieving a flawless finish, ensuring your chocolate maintains its integrity is paramount.
The Microwave Method: Speed and Convenience
When time is of the essence, or you're working with smaller quantities, the microwave is an incredibly efficient tool for
melting chocolate. While faster, it requires more vigilance to prevent overheating.
Why Choose the Microwave Method?
*
Speed: It's the quickest way to melt chocolate, requiring no waiting for water to boil.
*
Convenience: No special setup required beyond a microwave-safe bowl.
*
Ideal for Small Batches: Great for a quick drizzle or a small amount needed for a recipe.
Step-by-Step Guide to Melting Chocolate in the Microwave:
1.
Prepare Your Chocolate: As with the double boiler, chop your chocolate into small, uniform pieces. This promotes even melting and reduces the overall melting time.
2.
Choose Your Bowl: Place the chopped chocolate in a microwave-safe bowl (glass or ceramic are best). Avoid plastic bowls as they can sometimes retain heat and continue to cook the chocolate after removing it from the microwave.
3.
Microwave in Short Bursts: This is the most critical step. Microwave the chocolate on 50% power (if your microwave has this setting, otherwise full power is fine but watch even closer) for 30-second intervals.
4.
Stir, Stir, Stir: After each 30-second burst, remove the bowl from the microwave and stir the chocolate thoroughly. Even if it doesn't look fully melted, stirring helps distribute the heat evenly and prevents hot spots from forming and burning the chocolate. This "latent heat" will continue the melting process outside the microwave.
5.
Continue with Shorter Bursts: Once the chocolate starts to melt, reduce the microwave time to 15-20 second bursts, stirring well after each one. Repeat until the chocolate is almost completely melted, with just a few small lumps remaining.
6.
Finish with Residual Heat: Remove the bowl from the microwave and continue stirring until all the lumps have disappeared and the chocolate is perfectly smooth and glossy. The residual heat in the bowl and the already melted chocolate will finish the job.
Microwave Cautions:
*
Overheating is the Enemy: Chocolate can go from perfectly melted to burnt in seconds in a microwave. It often doesn't look burnt until it's too late. The key is to rely on stirring and residual heat for the final stage.
*
Uneven Heating: Microwaves heat from the inside out and can create hot spots. Consistent stirring between bursts mitigates this.
*
Don't Rush It: Resist the temptation to microwave for longer periods, even if it seems like it's taking a while. Patience is rewarded with perfectly melted chocolate.
Common Pitfalls and Pro Tips for Perfect Melts
Regardless of the method you choose, a few universal principles and potential issues are worth noting to ensure your success in
how to melt chocolate.
*
Preventing Seizing: As mentioned, water is chocolate's nemesis. Ensure all equipment is bone dry. If, by some unfortunate chance, your chocolate does seize due to a tiny bit of water, you *might* be able to rescue it by stirring in a tablespoon or two of a neutral oil (like vegetable or canola oil) or melted butter, but this will change the chocolate's texture and suitability for certain applications (like tempering).
*
Avoiding Burning: The primary causes of burnt chocolate are direct, high heat (stove) or extended, uninterrupted microwaving. Always use indirect heat on the stove, and short, interrupted bursts in the microwave. Burnt chocolate is acrid and cannot be salvaged – it’s best to discard it and start fresh. For further reading, our guide on
avoid burnt chocolate: the secrets to perfectly melted chocolate offers invaluable advice.
*
Choosing the Right Chocolate: Not all chocolate is created equal for melting. High-quality baking bars or couverture chocolate (chocolate with a high percentage of cocoa butter, designed for melting and tempering) are ideal. Chocolate chips often contain stabilizers that prevent them from melting into a completely smooth, fluid consistency, making them less suitable for dipping or fine finishes.
*
Uniform Chopping: Regardless of the method, chopping your chocolate into small, even pieces is crucial. This ensures that all pieces melt at roughly the same rate, preventing some from burning while others remain solid.
*
Temperature Control: Overheating chocolate, even if it doesn't burn, can negatively affect its flavor and texture, particularly if you're planning to temper it. Aim for just melted, not scalding hot.
These methods are essential for
unlock silky chocolate: essential methods for home bakers, ensuring your creations are always top-notch.
Conclusion
Whether you opt for the gentle embrace of a double boiler or the rapid warmth of a microwave, mastering
how to melt chocolate is an incredibly rewarding skill. The double boiler offers unparalleled control and a consistently smooth, glossy finish, making it ideal for delicate applications and larger batches. The microwave, on the other hand, provides unmatched speed and convenience for quick tasks, provided you exercise diligent supervision and frequent stirring. By understanding the nuances of each method, heeding crucial cautions like avoiding water, and employing smart techniques like uniform chopping and short bursts of heat, you'll consistently achieve beautifully melted chocolate ready to transform your desserts from delicious to divine. So go ahead, unleash your inner pastry chef, and enjoy the luscious results!