Avoid Burnt Chocolate: The Secrets to Perfectly Melted Chocolate
There's something uniquely alluring about perfectly melted chocolate. Its glossy sheen, smooth texture, and rich aroma promise decadent desserts, from elegant truffles to simple chocolate-dipped fruit. Yet, for many home bakers, the process of melting chocolate can feel like a high-stakes gamble, often ending in a burnt, crumbly mess or a seized, grainy disappointment. But fear not! Mastering how to melt chocolate is a fundamental skill that, once acquired, unlocks a world of culinary possibilities. It’s not about magic, but about understanding a few key principles and choosing the right method for your needs.
Whether you're crafting a show-stopping chocolate torte, drizzling over pancakes, or preparing a silky ganache, achieving that ideal consistency is paramount. The good news is that with a little knowledge and care, avoiding burnt chocolate and creating a wonderfully smooth, pourable product is entirely within your grasp. We'll explore the two primary methods: the gentle, controlled warmth of a double boiler and the quick convenience of a microwave, along with essential tips to ensure success every time.
The Gentle Touch: Melting Chocolate with a Double Boiler (Bain-Marie)
When precision and a consistently silky finish are your top priorities, the double boiler method (also known as a bain-marie) is your best friend. This technique relies on indirect heat, using steam to melt the chocolate gradually and evenly. This slow, controlled process drastically reduces the risk of burning and seizing, making it ideal for delicate chocolates or when you need a perfectly tempered result.
Here’s how to master the double boiler method:
- Set Up Your Station: Begin by selecting a medium saucepan and a heat-safe bowl (glass or stainless steel are excellent choices). The bowl should be slightly larger than the saucepan's opening, allowing it to rest comfortably on top without touching the bottom of the pot. It's crucial that the bottom of the bowl does not make direct contact with the water.
- Add Water and Heat: Fill the saucepan with about 1-2 inches of water. Place it on your stovetop and bring the water to a gentle simmer, not a rolling boil. Excessive boiling can create too much steam, which is our next crucial point.
- Prepare Your Chocolate: For optimal melting, chop your chocolate into small, uniform pieces. Smaller pieces melt faster and more evenly. Place the chopped chocolate directly into the heat-safe bowl.
- Melt with Care: Once the water is simmering, place the bowl of chocolate on top of the saucepan. The steam rising from the simmering water will gently warm the bowl, melting the chocolate. Stir the chocolate frequently with a dry rubber spatula or spoon. This ensures even melting and prevents hotspots.
- Remove and Dry: The chocolate will typically melt within 2-3 minutes. As soon as it's smooth and glossy, remove the bowl from the saucepan. Immediately wipe the bottom of the bowl with a clean, dry towel to remove any condensation. Even a tiny drop of water introduced into melted chocolate can cause it to seize and become grainy.
The beauty of the double boiler lies in its forgiving nature, providing ample control as you stir. It’s perfect for achieving that coveted velvety texture. For a deeper dive into choosing between methods, explore our Melt Chocolate Like a Pro: Microwave vs. Double Boiler Guide.
Speed and Caution: Melting Chocolate in the Microwave
When time is of the essence, the microwave offers a convenient and significantly faster alternative to the double boiler. However, this speed comes with a caveat: the microwave can be an unforgiving beast, making burning chocolate a real and present danger if not handled with extreme vigilance. The key to success here is short bursts, frequent stirring, and trusting your eyes and nose.
Here's how to microwave chocolate without burning it:
- Chop and Bowl: Just like with the double boiler, finely chop your chocolate into small, uniform pieces. Place them in a microwave-safe bowl (glass or ceramic work well).
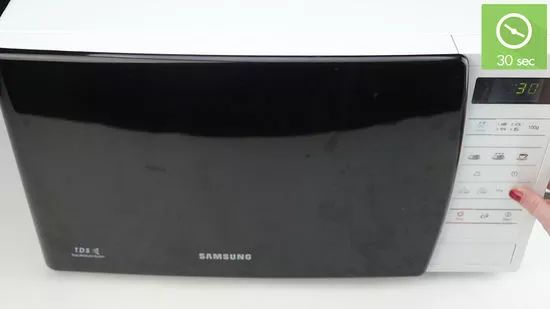
- Short Bursts are Key: Microwave the chocolate on 50% power for 30-second intervals. This lower power setting is crucial for preventing overheating.
- Stir, Stir, Stir: After each 30-second interval, remove the bowl from the microwave and stir the chocolate thoroughly. Even if the chocolate doesn't look melted, stirring helps distribute the heat evenly and prevents the formation of hotspots that can lead to burning.
- Observe and Repeat: Continue microwaving in 15-20 second intervals, stirring well after each, until the chocolate is mostly melted. At this point, even if a few small lumps remain, remove it from the microwave. The residual heat will continue to melt the remaining pieces as you stir, achieving a perfectly smooth consistency.
- Never Overdo It: The moment your chocolate looks glossy and smooth, stop microwaving. Overheating even slightly in the microwave can quickly turn your beautiful chocolate into a gritty, bitter mess. If you smell even a faint burnt odor, it's likely too late.
While quicker, the microwave method demands more attention. Always err on the side of caution with shorter intervals and more frequent stirring.
Common Pitfalls and How to Avoid Them for Silky Smooth Chocolate
Beyond the specific melting techniques, there are universal challenges that can sabotage your efforts to achieve perfectly melted chocolate. Understanding these pitfalls and implementing preventative measures will elevate your chocolate melting game.
1. The Dreaded Seizing
Chocolate seizing is perhaps the most frustrating issue encountered during melting. This occurs when even a minuscule amount of water comes into contact with the chocolate. The chocolate instantly transforms from a smooth, luscious liquid into a thick, lumpy, grainy, and unusable mass. How to avoid it: Absolute vigilance against water is essential. Ensure your bowls and utensils are perfectly dry. When using a double boiler, make sure the bottom of the bowl is wiped dry of any condensation after removal from the steam. Avoid covering the melting chocolate, as condensation can drip back into the bowl. High humidity environments can also contribute to seizing, so be mindful on particularly damp days.
Can you fix seized chocolate? Sometimes! For every 2-3 ounces of seized chocolate, stir in 1 tablespoon of hot neutral oil (like vegetable or canola oil) or melted shortening. Stir vigorously until it smooths out. This won't fully recover the original texture for all uses, but it can make it usable for certain applications like brownies or cakes.
2. Overheating and Burning
Burning chocolate happens when it’s exposed to too much direct or prolonged heat. Burnt chocolate tastes bitter, smells acrid, and develops an unappealing, crumbly texture. How to avoid it: With a double boiler, use gentle simmering water, not a rapid boil, and never let the bowl touch the water. With a microwave, stick to short bursts and stir religiously. The key principle for both methods is to remove the chocolate from the heat source *before* it's completely melted, allowing residual heat to finish the job. Chocolate holds its shape even when melted internally, so don't wait for it to look fully liquid before removing it and stirring.
3. The Wrong Chocolate Choice
Not all chocolates are created equal for melting. Chocolate chips, for example, often contain stabilizers (like soy lecithin) that help them retain their shape during baking. While they will melt, they may not achieve the same ultra-smooth, flowing consistency as baking bars or couverture chocolate. How to avoid it: For best results in dipping, drizzling, or making ganache, opt for high-quality chocolate bars (couverture, baking chocolate) with a cocoa butter content of 30% or higher. These melt more smoothly and offer a superior finish. Always chop bars into small, even pieces for consistent melting.
Beyond the Basics: Tips for Consistent Success
- Finely Chop Your Chocolate: Regardless of the method, smaller, uniformly chopped pieces will melt more quickly and evenly, reducing the risk of burning and ensuring a smooth final product.
- Use the Right Tools: Invest in good quality, heat-safe glass or stainless steel bowls and sturdy rubber spatulas. Avoid plastic bowls in the microwave if they show signs of pitting or discoloration, as they can sometimes leach chemicals or create hotspots.
- Patience is a Virtue: Especially with the double boiler, don't rush the process. Gentle, consistent heat and frequent stirring are your allies.
- Understand Melting Temperatures: Different types of chocolate melt at slightly different temperatures. Dark chocolate has the highest melting point, followed by milk chocolate, and then white chocolate (which isn't technically chocolate but a cocoa butter confection). Be extra careful with white chocolate as it's more prone to scorching due to its sugar and milk solids content.
- Keep it Moving: Continuous, gentle stirring helps distribute heat and promotes an even melt, preventing the chocolate at the edges from overcooking while the center remains solid.
For more essential techniques for every home baker, check out Unlock Silky Chocolate: Essential Methods for Home Bakers.
Conclusion
Melting chocolate doesn't have to be a source of stress in your kitchen. By understanding the principles behind indirect versus direct heat, exercising patience, and being mindful of common pitfalls like water contact and overheating, you can consistently achieve beautifully smooth, glossy, and perfectly melted chocolate. Whether you prefer the gentle control of a double boiler or the quick convenience of a microwave, these secrets will empower you to transform chocolate from a solid block into a delectable liquid canvas for your culinary creations. So go ahead, don your apron, and prepare to elevate your desserts with perfectly melted chocolate—no more burnt batches allowed!
